Tutorial
This tutorial provides a walkthrough of the unique capabilities of autoTS. autoTS is based on the WINGS workflow system, which uses semantic constraints to reason about workflows and as a result it can assist a user to create valid workflow.
To learn the basics about running workflows in WINGS, follow this tutorial.
Table of content
Running a workflow in autoTS
autoTS comes with several abstract templates for the analysis of time series data. These templates represent strategies used by researchers to analyze their data that can be instantiated with various methods. An example of a workflow strategy for spectral analysis is presented below:
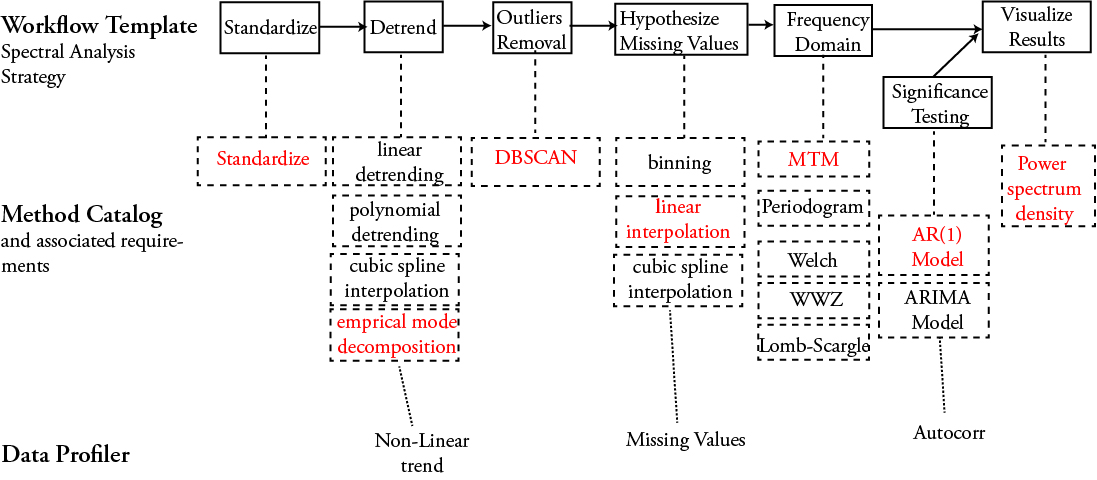
The methods are available through the Pyleoclim Python package.
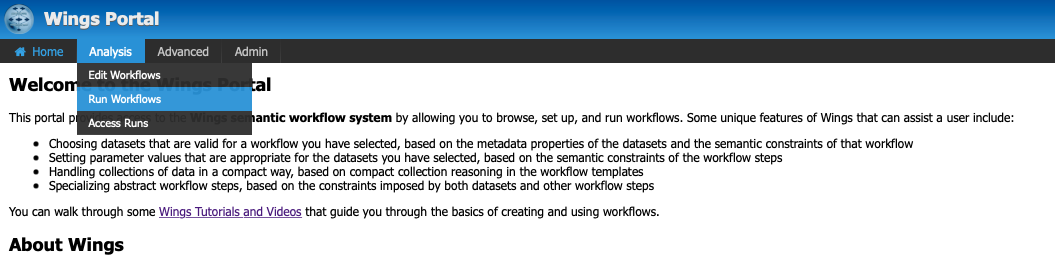
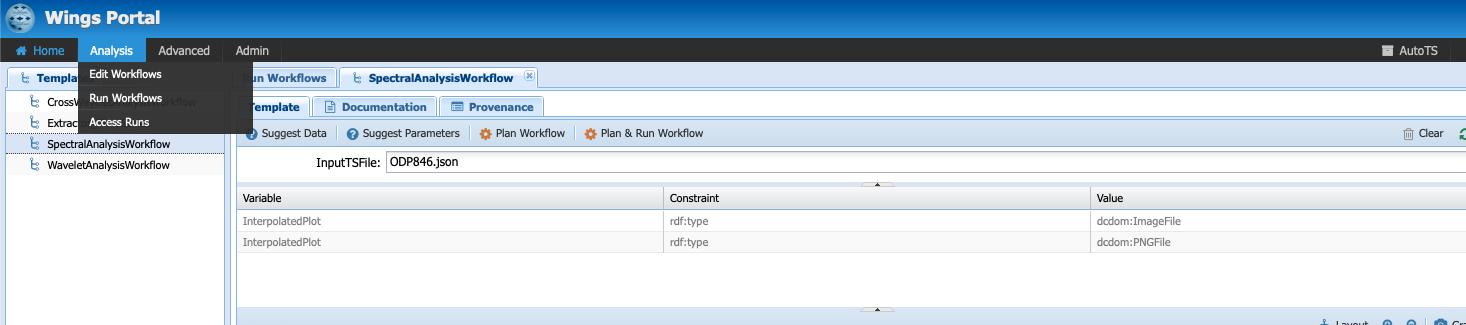
- To access a workflow templates, select
Analysis->Run Workflowsin the WINGS portal:
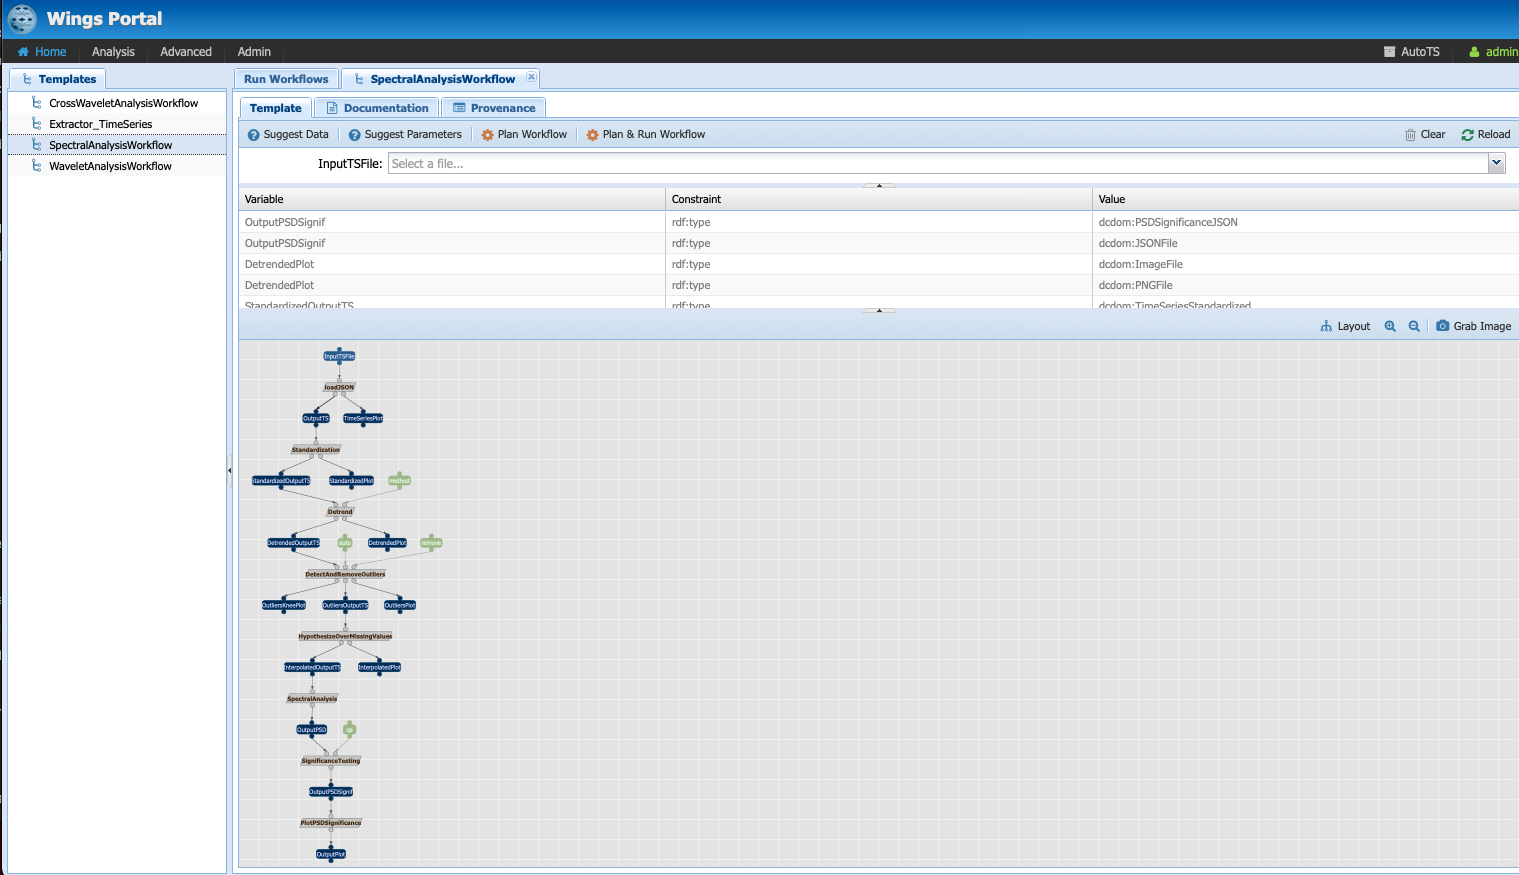
- Double-click on an abstract template:
-
The template represents the strategy for spectral analysis. Each of the grey box represent a type of function that can be performed (i.e., detrend). The blue boxes represent data flow in between the functions and the green boxes, the parameters.
-
You can run workflows by specifying an input timeseries, then click on
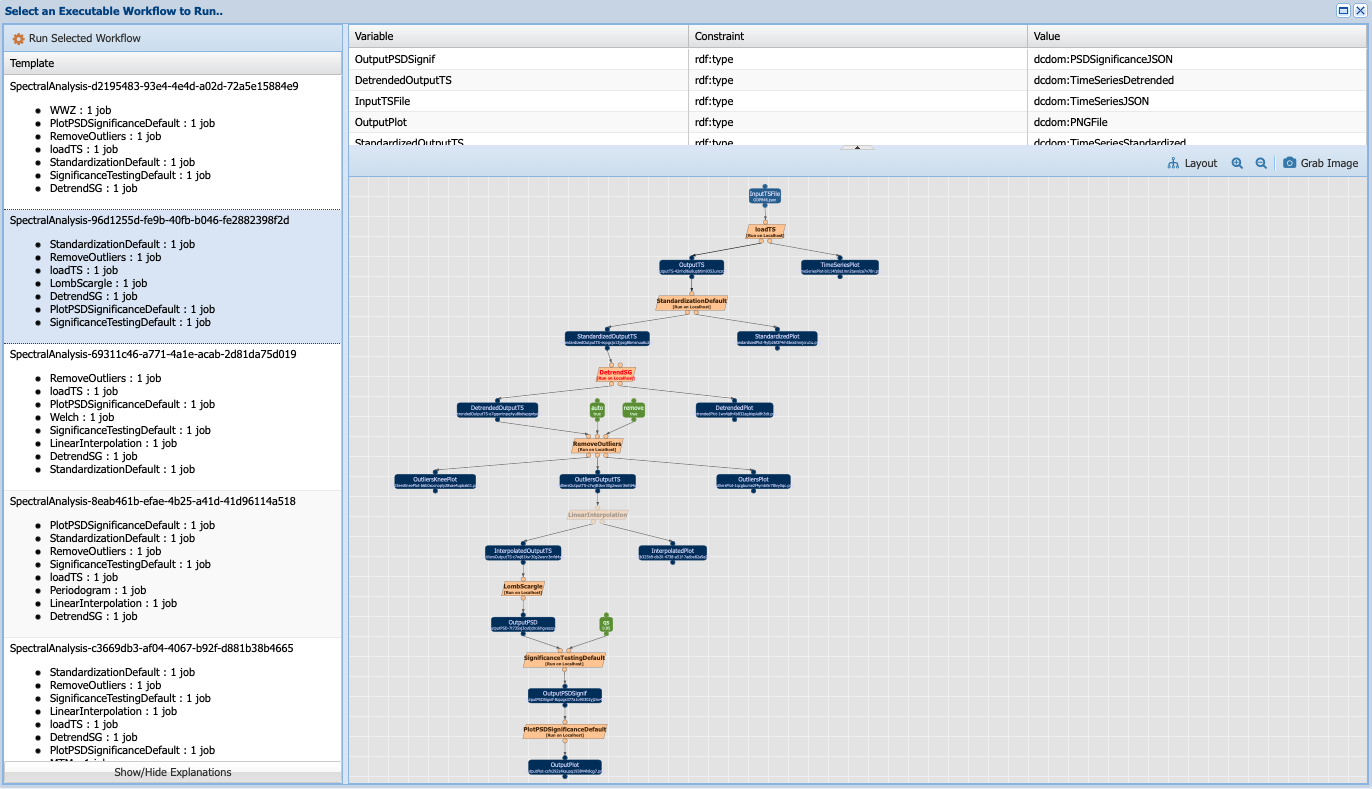
Plan Workflow. The following window will appear:
-
Under templates, you can select the executable workflow that you wish to run, which has been instanciated with proper methods. WINGS can reason over constraints. In our example, one such constraints is that the Lomb-Scargle method doesn’t require evenly-spaced data, therefore the LinearInterpolation is greyed out. You can run the workflow by clicking
Run Selected Workflow. -
You can run all possible workflows by selecting
Plan and Run Workflow.
Accessing your results
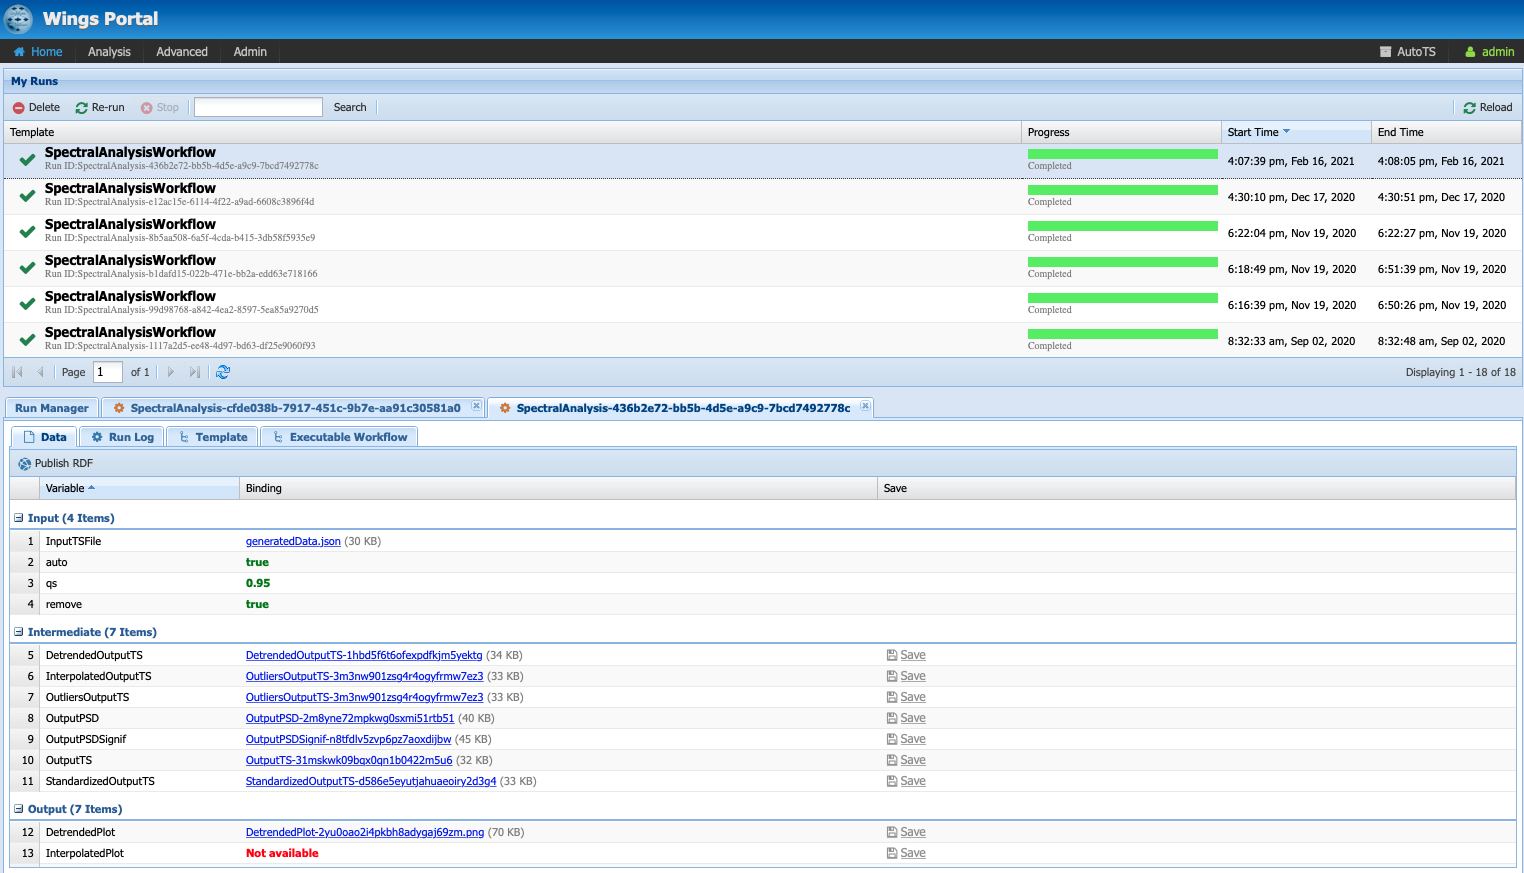
- Go to
Analysis->Access Runs
- On the top pane, you can see the progress of your analysis. The bottom pane will contain your results:
-
The
datatab contains the results of all your intermediate and final outputs along with the input data and parameter values. autoTS returns a plot of the results at each step, allowing you to dig through the results of the analysis. The JSON outputs are a serialization of the Pyleoclim objects. Pyleoclim contains several methods to import/export objects in/to JSON. -
The
run logtag contains a log of the executions of each method. Note that already executed components will not be rerun twice for efficiency. -
The
templatetab contains the strategy while theexecutable worklfowtab shows you the workflow that has been executed along with a unique identifier for the data.
Uploading data
- Click on
Advanced->Manage Data
- Expand the data folder until you have access to
TimeSeriesJSON.
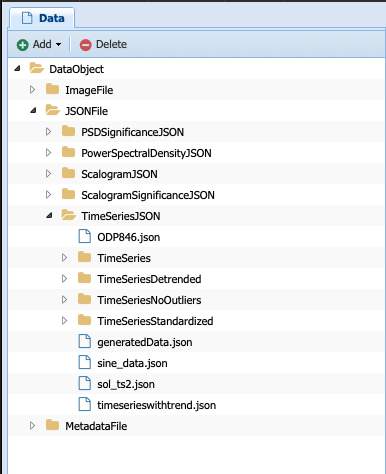
A TimeSeriesJSON data type is essentially a Series object in Pyleoclim. You can create a JSON file from a Series object using the utilities in Pyleoclim.
- To add a new Series, make sure that
TimeSeriesJSONis selected and click on upload file.

A dialogue box will appear. Click Add File and select the file on your local machine. Then click Upload. Your timeseries is ready to use!